
To create this Set you will need:
PSP and Animation Shop
Both sold by Corel
A Tube
I used art by Ismael Rac
Tubes and License can be bought at his Store
Don't use this art without a proper license
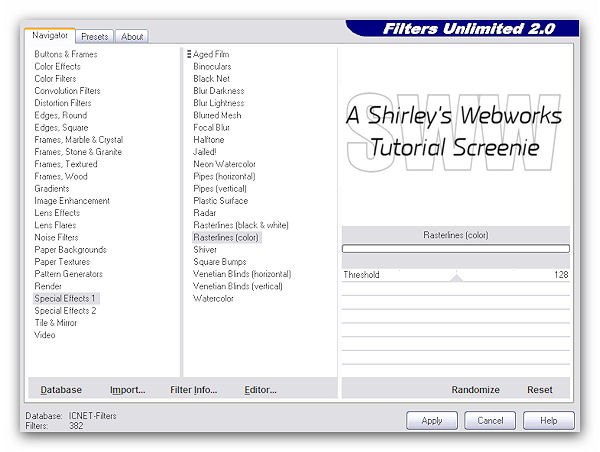
Filters Unlimited 2
DSB Flux - Bright Noise
Font of choice
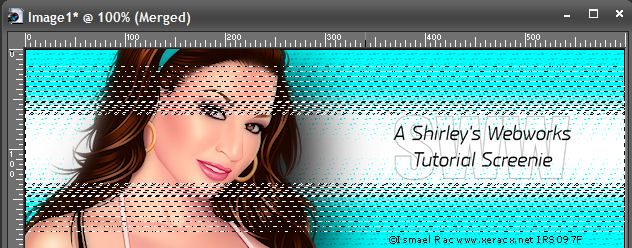
I used P22 Garamouche on the Header above
and AllisonROB on the sample set below
Ready?
Let's Begin!
Choose a medium color from your Tube for the foreground
White for the background
Make a gradient on the FG
Linear- Angle 0 - Repeats 1
New Image - 600x200
Fill your Tag with your gradient
Duplicate - On the duplicate
Filters Unlimited 2
Change the Blend Mode to Screen - Merge Visible
New Layer - Fill with your gradient
Effects -Artistic Effects - Halftone
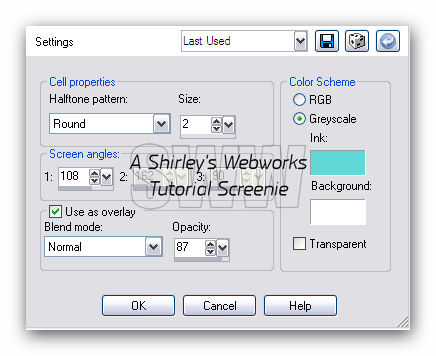
Change the top color to your foreground color
Change the Blend Mode to Overlay - Merge visible
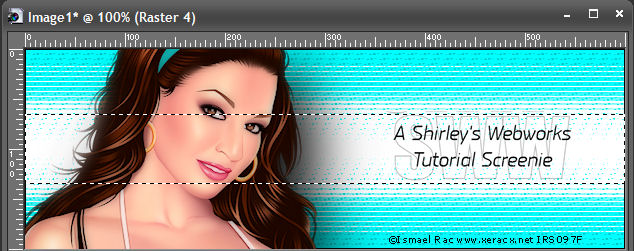
Paste your Tube and move left
Give your Tube a Blurry Drop Shadow
Crop your Tag
I used EC5 Impact - Perspective Shadow - Drop Shadow
New Layer - Send to Top - Fill with a dark color
Select All - Modify - Contract 1 - Delete - Deselect
Now it's time to add your Name, CR info and License # if necessary
Highlight your background layer
Get out your magic wand and click in the white area in the middle
Selections - Modify - Select Color Range
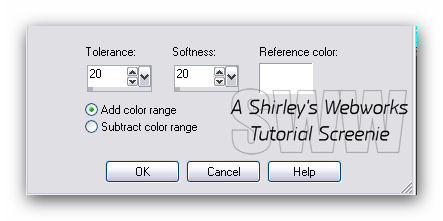
Click once in the Reference Color box
Then hover over your tag and click in a white area just above the white area already selected
Click ok in the color selection dialog box, then click ok in the
Select color range dialog box
Now all this should be selected
Duplicate this layer twice for a total of three background layers
On each of these - DSB Flux - Bright Noise
Hit the Mix button once for each layer
On the Header Sample I used 49 - Mix checked
On the Sample Below, I used 27 - Mix checked
You choose how much noise you want
Deselect
Hide the three background layers
Merge the rest together
Unhide all layers
Now it's time to get what we need for our Avatar
Shift + D to make a copy of your Tag
On the copy, delete the top layer
Now you should have just the three background layers
Crop to 150x150
Add a 1px border like we did for the Tag
Add your Name and Animate as usual
Sample Avi:

Back to our Tag
You should have four layers now
The top layer with Art, Name, CR and 1px Border
Three background layers
Animate as usual
If you are unfamiliar with the process or need a refresher
I have written a little mini-tut explaining how to do it HERE
That's it, you are done!
Another Sample Set:

I love seeing Tutorial Results, so if you have tried this,
or any of my Tutorials, please leave a link in the comments sections on my BLOG
Tutorial Idea, Tags/Avatars ©Shirley franklin
http://www.shirleyswebworks.com