
To create this tag you will need:
PSP and Animation Shop
Both available at Corel
A close-up tube
I used art by Keith Garvey
I bought this tube while he was at MPT
Tubes and license for Keith's art
are available as of this writing at PTE
Do not use without a proper license
MuRas Meister - Cloud and Copies
Gregs Pool Shadow
Eye Candy 4000 - Corona
AAA Frames - Foto Frame (for the avatar)
Ready?
Let's Begin!
Copy your Tube and paste as a New Image
Effects- Distortion- Pixellate -30 -Symmetric checked
Resize Image - 600x200 -All layers Checked -Lock unchecked
MuRa Copies - Wallpaper - Default Settings
Duplicate layer- Hide the Duplicate
Back on the BG Layer - Gaussian Blur 2
Gregs Pool Shadow - Change intensity to 50
New Layer
Choose two contrasting colors from your tube for FG/BG
MuRa Clouds - Hit the reset button
Texture Effects - Weave - 2, 15, 1 -Fill gap checked - Both colors white
Unhide and highlight the top layer
Motion Blur - 45, 100%
Edge effects - Enhance
Change the Blend Mode of the Clouds layer to screen
Change the Blend Mode of the Top layer to Overlay or Hard Light
Merge Visible
Get out your Rectangular selection tool
Select a rectangle across the top of your tag - See sample tag for placement
Promote selection to layer
Duplicate - Hide the Duplicate -Deselect
On the original rectangle - EC4000 - Corona
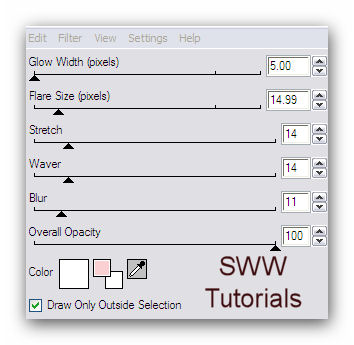
Eye Candy 4000 is no longer available,
but I'm sure there's a Corona in later versions
Or you could improvise with a gradient glow or a white drop shadow
Merge down into the BG Layer
Now you should have two layers:
The BG with the Corona'ed Rectangle
The second rectangle Layer
Paste your Tube
Send to top and move left - Drop Shadow- 5, 12, 73 and 50
Crop your Tag
New Layer - Send to top
Fill with dark color from your Tube
Select All - Contract 1px - Delete - Deselect
Time to add your name and CR info and License # if necessary
Lets make our Avatar
Shift + D to duplicate your Tag
Resize to 150 High
Crop to 150x150
Merge Visible
AAA-Frames -Foto Frame
Width 10, Matte 1, Opacity 50
Add the 1 px border
Add Artist CR and License # and your Initial
Merge Visible and Save as a Jpg
You're done with the Avatar
Back to our Tag
Hide your BG and Rectangle Layers
Merge Visible
Unhide everything
If you want to skip the animation, you're done!
Animation
Select All - Highlight and copy your Rectangle Layer
In Animation Shop - Paste as New Animation
Insert Image Effect
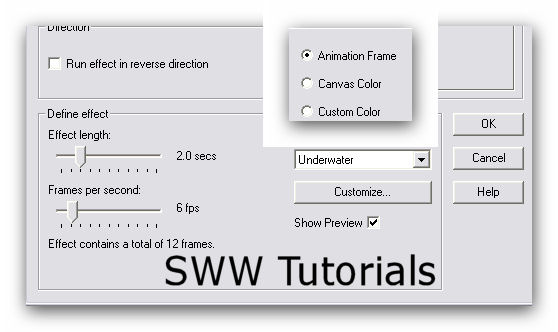
Hit the Customize button
Apply Sunlight Dappling Checked
Sunlight Intensity is 10
Water Depth is also 10
Change the numbers for the waves to these:
Wave 1: 10, 10
Wave 2: 23, 26
Wave 3: -19, -17
Wave 4: 14, 15
Wave 5: -18, 3
Wave 6: -1, 19
Wave 7: 12, -7
Wave 8: 14, 5
Wave 9: -9, 10
Wave 10: -20, 0
Set Wave 11 to 16: 0,0
Delete the first Frame
Now you should have 12 Frames
Minimize for now and go back to PSP
Highlight your BG Layer and Copy
Back in Ani Shop - Paste as a New Animation
Hold down your ctrl key and keep hitting the "L" key
Until you have 12 Frames
Open your first animation
Select All - Copy
On your second Animation, select all
Then Paste into Selected Frame
Hold down the left mouse button then place it where you want it and let go
View Animation to make sure it looks right
Back to PSP
Highlight your Layer with Tube, Border, Name and CR Info
Copy- Then back in Animation Shop, Paste as New Animation
Hold down your ctrl key and keep hitting the "L" key
Until you have 12 Frames
Select All - Copy
On your second Animation, select all
Then Paste into Selected Frame
Hold down the left mouse button then place it where you want it and let go
And that's it-you're done!!
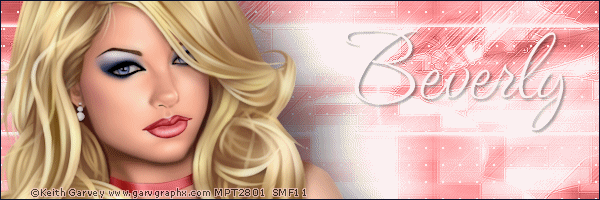
Sample Set:
I Love it when people try my Tutorials!
I also love seeing your results.
If you try this, or any of my Tutorials,
please post a link in the comments section of my Blog
Tutorial Idea, Tags/Avis ©Shirley Franklin
www.shirleyswebworks.com