|
April 4, 2013 To create this Set you will need: A Tube I used Art by Barbara Jensen Tubes and License to use Barbara's Art available HERE
Filter Factory E - Warm Cloth DSB Flux - Bright Noise MuRa's Meister - Copies My Selection HERE
Ready? Let's Begin! Choose a Light Color for your FG Choose a Dark color for your BG Make a Linear Gradient on the FG Angle 45 - Repeats 0
New Image - 600x400 Fill with the Gradient
Filter Factory E - Warm Cloth
At this point your BG is Black and White If you want to leave it that way, move on to the next step
If you want color- Change your BG from Gradient to Color Choose the color you want for your FG Change to Target Brush
Hold down your Left Mouse Button and Paint over the entire area of your Tag Effects - Edge Effects - Enhance
Load my Selection Promote Selection to Layer Deselect - Mirror Duplicate - Flip Merge Down MuRa's Meister - Copies Line Preset - Change the Number to 4 Effects - Distortion Effects - Wave
Drop Shadow - 0, 0, 100 and 5 - Twice
Select your BG Layer Magic Wand - Add(Shift) - RGB Value - Tolerance 5 - Feather 0 Click in one of the lighter areas toward the Left side of your Tag Selections - Modify - Select Color Range Tolerance and Softness 20 - Add Checked Click in the Color Box, then click in the area on the Tag that you have selected Promote Selection to Layer
Duplicate this Layer Twice for a Total of Three Layers On each of these DSB Flux - Bright Noise 46 - Mix - Hit the Mix Button once for each Layer On each of these - Drop Shadow 1, 1, 100 and 1 Hide the Top Two of these Layers
Select the Top Layer New Layer Fill with your Light Color Select All - Contract 4 - Delete Expand 1 - Invert Selection Fill with your Dark Color Deselect Drop Shadow - 0, 0, 100 and 5 Paste your Tube - Move into Position Drop Shadow - 20, 20, 100 and 100 Crop your Tag Add your Name, CR info and License#
Let's get what we need for Forum Tag and Avatar Shift+D to Copy your Tag - Twice
On the First Copy Remove Tubes, Border, Name and CR Layers Set your Crop Box to 150X150 Move where you want it and Hit the Arrow to Apply Add the Border and your Name or Initial Set this aside for now This is your Avatar
On the Second Copy Remove the Border and your Main Tube Move your CR and Name Layers to the Center of the Tag Custom Selection Top - 50 Right - 600 Bottom - 350 Left - 0 Crop to Selection Add the Border Add your Tube -Drop Shadow 20, 20, 100 and 100 Crop to Merged Opaque Move your Name and CR Layers back into position Set this aside for now This is your Forum Tag Animation In PSP - Edit - Copy Merged In Animation Shop (AS) - Paste as New Animation In PSP - Hide the Bottom BG Layer - Unhide the Middle one- Edit - Copy Merged In Animation Shop (AS) - Paste After Current Frame In PSP - Hide the Middle BG Layer Unhide the Top Layer- Edit - Copy Merged In Animation Shop (AS) - Paste After Current Frame Save as a Gif Animate the Forum Tag and Avi the same way.
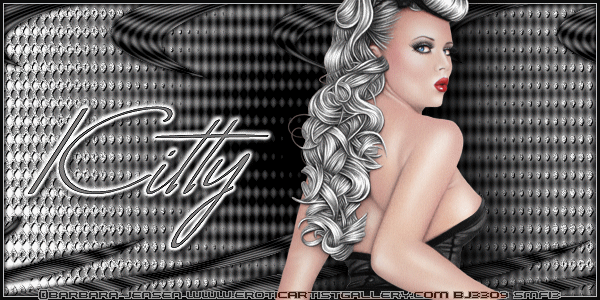
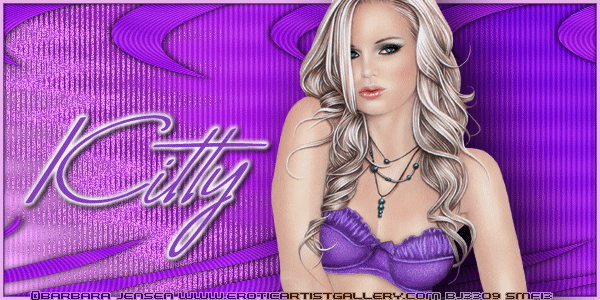
Here are a couple more Samples Also using Barbara Jensen Art
If you try any of my Tutorials I would love to see what you made! Please leave a link in the comments section on my Fanpage
Tutorial Idea, Tags/Avis ©Shirley Franklin www.shirleyswebworks.com
|