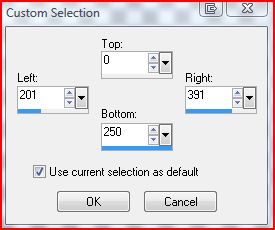
For this tutorial you will need: PSP - I used X3, but I am sure this can be done in any version Animation Shop A tube and a close-up I used the wonderful art of Jennifer Janesko Please do not use her art without a proper license from CILM MuRa Meister-Copies DSB Flux- Bright Noise AAA -Foto Frame Font of choice-I used Ambience BT Let's begin! New Image 600x250 Make a fg/bg gradient using a light and dark color from your tube Linear-Angle 45-Repeats 3 Selection tool-custom Selection
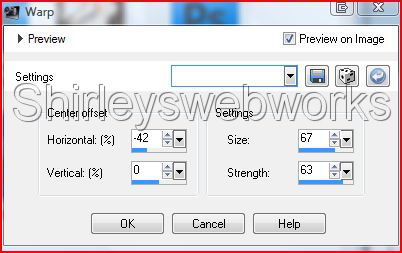
Selections-Modify Feather-5 Fill with your gradient-Gaussian Blur 10 Deselect MuRa Copies-Wallpaper Rotate-Default Settings Dulicate layer-mirror and flip it-change the blend mode to Hard Light (You might want to use Overlay or some other blending option, depending on your tube) Merge Visible-copy and paste your close-up and move it to the right-change the blend mode to hard light and lower the opacity to around 50, depending on the tube you used Merge Visible-Texture Effects -Blinds 2, 14, horizontal and light from top checked and white AAA - Foto Frame-width 9, opacity 50 Paste your tube and move to the left side - drop shadow 2, 2, 50 and 17 - Merge down New Layer- Select a thin rectangle going from top to bottom-fill with your dark color Deselect-Distortion Effects-Warp
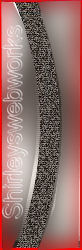
You should have a nice curve like this:
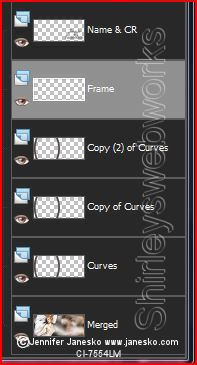
Duplicate your curve and mirror- move them into position so they will frame the focal tube Merge your Parentheses together-Blinds (same settings)-Drop Shadow (2, 2, 50, 2) Duplicate this layer twice for a total of 3 layers New Layer-send to top-fill with your dark color-select all-contract 1-delete Time to add your name and CR info Your Layer palette should look like this:
Time to fire up Animation Shop! Select the top curves layer-DSB Flux-Bright Noise-Mix 47 On the middle curves layer-hit mix twice on the top curves layer-hit mix 3 times Hide the top 2 curves layers-copy merged and paste as a new animation in Animation Shop Back in PSP-Unhide the middle curves layer and hide the bottom one Paste in Ani Shop after current frame Back in PSP-Hide the middle curves layer and Un-hide the top one Paste in Ani Shop after current frame View-Animation - If it looks good, save it as a gif and you're done! For the Avatar: Before I merged the close-up into the background layer on the tag I copied and pasted the background as a new Image-cropped it to size, ran the Blinds and AAA Frames on it Then I made the curves like in the tag-added the 1 px frame and did the animation like for the tag
And that's it! I hope you have enjoyed my tutorial. I like to see results, so please post a link to them in the comments on my blog.
Tutorial and Graphics (C)Shirley Franklin www/shirleyswebworks.com
|