To create this Tag you will need: A Tube and a Close-up I bought this tube when Keith Garvey was with PTE Tubes and Licence are now available at his STORE
Ready? Let's Begin! Choose a Medium Dark Color for your FG Choose a Slightly Lighter Shade of the same color for the BG Make a Linear gradient on the FG Angle 45 - Repeats 5
New Image - 800x600 Fill with your Gradient Effects - Edge Effects - Enhance - Twice Duplicate and Mirror Change the Blend Mode to Overlay, or one you like better Merge Visible
New Layer Change your FG Gradient to Sunburst Fill with your Gradient Effects - Edge Effects - Enhance - Twice Change the Blend mode This part is a little Tricky It needs to look like this:
Merge Visible
Selection Tool Circle - Add(Shift) - Feather 0 Place your Cursor at X400 - Y300 Draw out a Circle Like So:
Promote Selection to Layer
Deselect - Stay on this Layer Selection Tool Circle - Add(Shift) - Feather 0 Place your Cursor at X400 - Y300 Draw out a Circle Like So:
Promote Selection to Layer
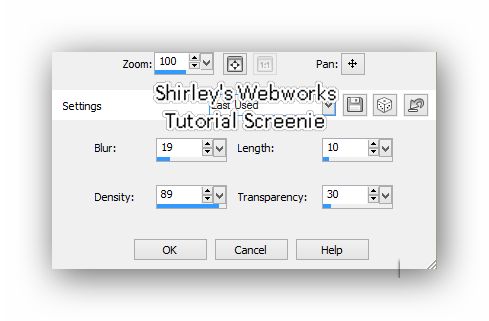
Select your Bottom Layer Effects - Texture Effects - Weave Gap 1 - Width 3 - Opacity 1 Weave color is your Dark Color Gap Color is your Light Color
Open the pattern you want to use or make one like I did Open your Close-Up Tube Zoom in a Bit Selection Tool set on Rectangle Draw out a rectangle in the patterned area you want to use Edit - Copy Open a new Image 200X200 Select All - Paste into Selection - Deselect Sharpen or Enhance Edges if you need to Seamless Tiling - Corner and Bi Directional Checked H and V - 0 Transition 100% Corner Style - Curved Set your BG to Pattern Choose the Pattern you just made, or another one you have Let's get back to our Tag
Select the First Promoted Selection Select All - Float - Defloat Fill with your Pattern Effects - Texture Effects - Fur
Deselect - Drop Shadow 0, 0, 50 and 25
Time to Resize if you want it smaller if you want I made mine 650X488
Select your BG Layer Add a New Layer Fill with your Dark Color Contract 2 - Delete - Deselec
Select the Second Promoted Selection Layer Effects - Texture Effects - Weave Gap 1 - Width 3 - Opacity 1 Weave color is your Dark Color Gap Color is your Light Color Duplicate - Keep Selected
On the Duplicate Paste your Close-Up and Move into Place Change the blend to one you like and lower Opacity Invert Selection - Making sure you're on the CU Layer - Delete - Deselect Merge Down
On the Original Drop Shadow 0, 0, 50 and 25 Duplicate Image Effects - Offset
Duplicate Layer - Mirror - Merge Down Duplicate this Layer for a Total of Three On the Bottom One Adjust - Add Noise Gaussian - 45% - Mono Checked On the Middle One Adjust - Add Noise Gaussian - 47% - Mono Checked On the Top One Adjust - Add Noise Gaussian - 46% - Mono Checked Hide the Top Two of these
Add your Tube and give it a suitable Drop Shadow Move into place Crop to Merged Opaque Add your Name, CR Info and License#
Animation Open Animation Shop(AS) In PSP - Copy Merged In AS - Paste as New Animation In PSP - Hide the Bottom Noise Layer and Unhide the Middle one Copy Merged In AS - Paste after Current Frame In PSP - Hide the Middle Noise Layer and Unhide the Top one Copy Merged In AS - Paste after Current Frame View Animation - If you like it, save as a Gif
Here's another Sample also using Art by Keith Garvey
If you try this, or any of my Tutorials I would love to see what you made Please Post results and comments on my Fanpage
|