|
April 9, 2011
To create this Set you will need: PSP and Animation Shop Both available from Corel A Tube I used art by Keith Garvey Tubes and License available from PTE Do not use this art without a proper license Photo Tools - Frosted Edger White Mehdi - Kaleidoscope 2 DSB Flux - Bright Noise Font of Choice - I used P22 Petermoss (Pay Font)
Ready? Let's Begin!
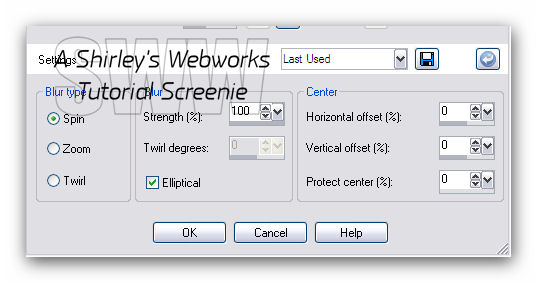
New Image 600x250 Choose Light and Dark colors for your FG/BG Make a FG/BG Gradient Angle 45 - Repeats 4 Fill your Tag with this gradient Adjust - Blur - Radial Blur
Edge Effects - Enhance Photo Tools - Frosted Edger White Diffuse 255 - Encroachment 128 New Layer - Custom Selection Top - 40 Right - 600 Bottom - 59 Left - 0 Fill with a light color of your choice Deselect - Duplicate and Flip Merge these two Layers together Mehdi - Kaleidoscope 2
Rectangular Selection Tool Mode - Add (Shift) Make two selections on your Tag like this
Promote Selection to Layer Keep Selected Highlight the original Mehdi Layer Selections - Invert Promote Selection to Layer DESELECT Delete the Original Mehdi Layer Now you should have three Layers The two Promoted Selection Layers and the BG
Here's the part where you get to play Choose which of the Promoted Selection Layers that you want to be a different color Select All - Float - Defloat - Expand 1 New Layer - Fill the Selection with your color Deselect On both the Promoted Selection Layers Drop Shadow - 0, 0, 45, 5 Choose whether you want the glitter on your colored layer or the other one Duplicate this Layer Twice for a total of three Layers On each of these three Layers DSB Flux - Bright Noise - 46 Mix Hit the mix button once for each Layer
Copy your Tube and Paste as a New Layer on your Tag Move where you want it and give it a Blurry Drop Shadow Crop your Tag New Layer - Make sure it's on Top Fill with your Light Color Select All - Contract 4 - Delete Expand 1 - Invert - Fill with Dark Color Deselect Drop Shadow - 0, 0, 50 and 5
Add your Name, CR info and License# if Necessary
ANIMATION Hide your top two DSB Flux layers - Edit - Copy Merged In Animation shop - Edit- Paste as new animation Back in PSP- Hide the bottom and top DSB Flux layers and unhide the middle one Edit - Copy merged In Animation shop - Edit - Paste after current frame Back in PSP- Hide the bottom and middle DSB Flux layers and unhide the top one Edit-copy merged In Animation shop - Edit- Paste after current frame View animation- If you like it, save as a gif and you're done!
AVATAR Shift+D to copy your Tag Delete Layers with Art, Name, CR info and Border Crop to 150x150 Make the Border as you did for the Tag Animate (or not)
Sample Set:
If you try this, or any of my Tutorials I would love to see what you made! Please leave a link in the comments section on my Blog
Tutorial Idea, Tags/Avis ©Shirley Franklin www.shirleyswebworks.com
|