
To create this Set, you will need:
PSP and Animation Shop
Both are sold by Corel
A Close-Up Tube
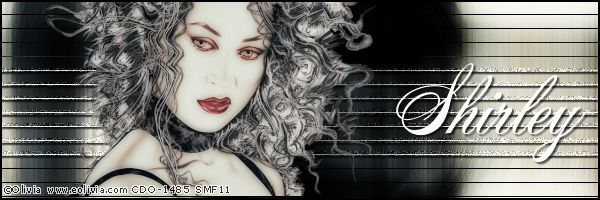
I used Art by Olivia
Tubes and License can be bought at CDO
L en K - Mayra
MuRa Meister - Copies
DSB Flux - Bright Noise
My Selection Here
Ready?
Let's begin!
Unzip my Selection to your Selections Folder
Copy your Tube and Paste as new Image
Resize to 600x600 - Lock unchecked -All Layers Checked
MuRa Meister - Copies - Wallpaper - Default
Resize to 600x200 - Lock unchecked -All Layers Checked
Duplicate Layer
On the Original - Gaussian Blur 15
On the Duplicate - Radial Blur
Spin - Strength - 19 - Elliptical unchecked - All else to 0
Edge Effects - Enhance - Blend Mode - Overlay or Hard Light
Merge Visible
Duplicate Layer
L en K - Mayra
Top to Bottom - 0, 149, 76 and 2
Pull down the opacity a little-It's different for each tag
Just enough to let the bottom layer show thru a little
Merge Visible
For the next step, I used the Rectangular Selection tool
To select around the white stripes like so

You can do that too, or you can load my Selection
Selections - Load Selection from Disk
Drop Shadow - 2, 2, 64 and 2 - Keep Selected
Duplicate this Layer twice for a total of Three
You know where we're going with this don't you?
On Each of these Layers - DSB Flux - Bright Noise
Mix checked - 47 - Hit the Mix Button once each time
For the Example below, I used the Lighter button instead
Just use whatever looks better for your Tag
Deselect
Lets get what we need for the Avatar now
Shift + D to duplicate your Tag
Get out your Crop Tool - Set it to 150x150
Move it to where you want it and hit the little green check mark
I moved mine to the bottom right
Set this aside for now
Back to our Tag
Paste your Tube - Move Left and give it a blurry Drop Shadow
Crop your Tag and add a Layer
Fill with Black or a dark color from your Tube
Select All - Contract 2 - Delete - Deselect
Time to add your Name and CR (and Lic # if necessary)
Hide your BG Layers and Merge Visible
Unhide the bottom Layer
Copy merged and Paste as a New Animation in Animation Shop
Back in PSP - Hide the bottom layer and unhide the next one up
Copy merged and Paste after current frame in Animation Shop
Back in PSP - Hide the middle layer and unhide the next one up
Copy merged and Paste after current frame in Animation Shop
View Animation to make sure it looks right and save as a gif
Lets finish up the Avi
Add a layer and send to top
Fill with Black or a dark color from your Tube
Select All - Contract 2 - Delete - Deselect
Add your Name and CR (and Lic # if necessary)
Hide your BG Layers and Merge Visible
Animate the same way you did for the Tag
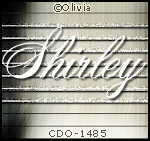
Sample Avi

Another Example, also using the awesome art of Olivia
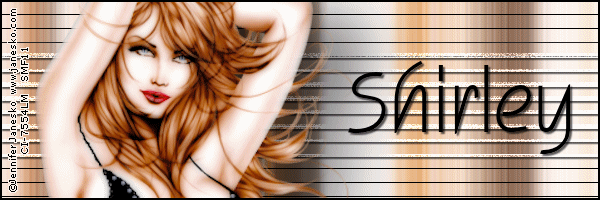
Another, using the fantastic art of Jennifer Janesko
who is also with CDO

As always, I love seeing your results if you try any of my Tutorials
Please leave a link in the comments section of my Blog
Tutorial Ideas, Tags/Avis ©Shirley Franklin
www.shirleyswebworks.com
