|
To create this Set you will Need A Tube and a Close-up I used art by Ismael Rac Tubes and License available at his Store PSP and Animation Shop Both available from Corel VM Instant Art - Lightlines Eliminate Black Xero - Porcelain DSB Flux - Bright Noise Greg's Pool Shadow Font of choice
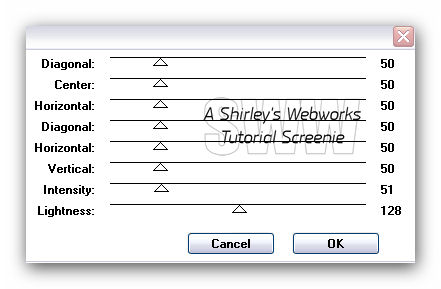
Ready? Let's Begin! New Image - 600x250 Fill with a color from your Tube Greg's Pool Shadow
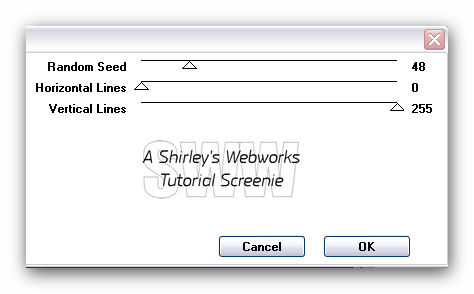
Duplicate this Layer Three times for a Total of four Layers Highlight the bottom Layer and rename it BG Highlight the next Layer up VM Instant Art - Lightlines
Highlight the next Layer up VM Instant Art - Lightlines - Change the Random Seed to 53 Highlight the next Layer up VM Instant Art - Lightlines - Change the Random Seed to 57 Run the Eliminate Black filter On each of these Lightlines Layers Hide the top two Lightlines Layers
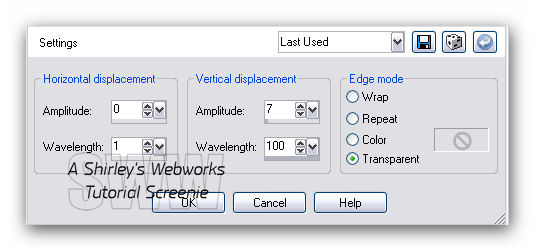
Highlight your BG Layer - Duplicate - Send to Top Mirror and Flip Select All - Contract 20 - Invert - Delete - Deselect Effects - Distortion Effects - Wave
Select All - Float - Defloat Copy your Close-up and place as desired Selections - Invert Highlight your Tube Layer - Delete - Deselect Change the Blend Mode to Luminance and lower the opacity a little Merge Down Xero - Porcelain - Blue channel to 0 Drop Shadow - 0, 0, 70 and 5
Copy your Tube and Paste as a New Layer Send to top if necessary Place as desired and give it a blurry Drop Shadow Crop your Tag
New Layer Fill with a dark color Select all - Contract 2 - Delete - Deselect Drop Shadow - 0, 0, 70 and 5 Add your Name, CR Info and License# if necessary
Let's get what we need for our Avatar now Shift+D to copy your Tag Delete Layers with Art, Name, CR Info and Border Duplicate the BG Layer - Send to Top - Flip and Mirror Select All - Contract 15 - Invert - Delete - Deselect Effects - Distortion Effects - Same Wave effect as before Add a New Layer - Send to Top Fill with a dark color Select all - Contract 2 - Delete - Deselect Drop Shadow - 0, 0, 70 and 5 Add your Name or Initial and Animate Like we will for the Tag
Animation Fire up Animation Shop In PSP Hide the top two Lightlines Layers Edit - Copy Merged In Animation Shop Edit - Paste as New Animation Back in PSP Hide the bottom Lightlines Layer and Unhide the Middle one Edit - Copy Merged In Animation Shop Edit - Paste after current Frame Back in PSP Hide the Middle Lightlines Layer and Unhide the Top one Edit - Copy Merged In Animation Shop Edit - Paste after current Frame Edit - Select All Animation - Frame Properties - Change to 20 View - Animation to make sure it looks like you want Save as a gif and you're Done!
Sample Sets
If you try any of my Tutorials I would love to see what you made! Please leave a link in the comments section on my Blog
Tutorial Idea, Tags/Avis ©Shirley Franklin www.shirleyswebworks.com
|