
To create this set you will need
A Tube
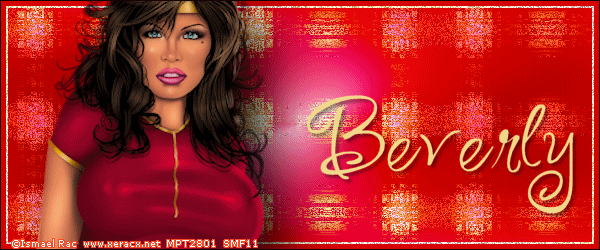
I used the fabulous art of Ismael Rac
I bought this tube way back when Ismael was with MPT
At the time of this writing Ismael's Tubes and License
Can be bought from his STORE
Font of choice - I used P22 OhLey (Pay Font)
Filters
DSB Flux - Bright Noise
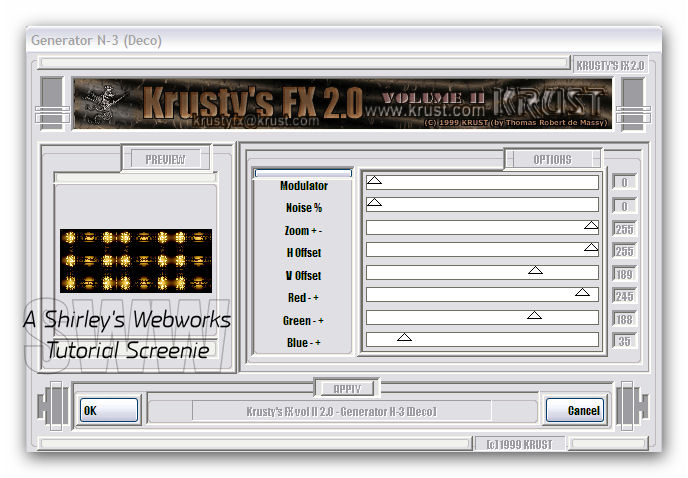
Krustys FX 2.0 - Generator N-3
Alien Skin Eye Candy 5 - Perspective Shadow
Ready?
Let's Begin!
Choose a bright color from your Tube for your foreground
Choose a nearly white shade of your FG color for your BG
Make a FG/BG gradient on the FG
Linear - Angle 45 - Repeats 3
New Image - 600x250
Fill with your Gradient
Duplicate Layer - Mirror - Change Blend Mode
Play around here a little
For example on top, I chose Multiply
For sample set at the bottom, it was Overlay
Whichever option you choose here-the result should be Bright
If it's not very bright, you can duplicate and change the blend mode to screen
That should lighten it up
Merge Visible
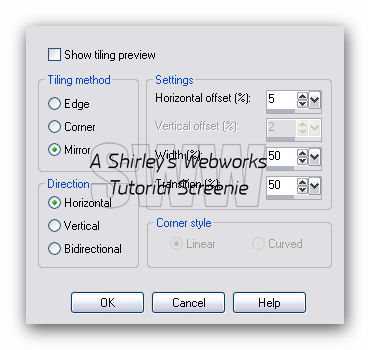
Effects - Image Effects - Seamless Tiling
Duplicate
On the Duplicate - Krustys FX 2.0 - Generator N-3
Again, play with the Blend Modes
I used Overlay - Merge Visible
Rename it Background
Magic Wand - RGB - Tolerance 10
Click once in one of the lighter circles
Modify - Select Color Range
Tolerance and Softness - 20, 20
Click once in the Reference Color Box
Hover over your Tag and click in the lightest of the circle areas
Click ok
Now click again in the Reference Color Box
Hover over your Tag and click in the darker of the circle areas
Click ok and see that you have added to the first selection
Repeat this until you have everything selected that you want selected
Duplicate the Background Layer twice for a total of three Layers
On each of these three Layers
DSN Flux - Bright Noise - Mix Checked - 45
Hit the mix button once for each Layer
New Layer - Send to Top
Rename Sparkle Border
Select All - Contract 8 - Fill with your Very Light Color (BG)
Contract 2 - Delete - Keep Selected
Expand 1 - Invert
Keep Selected
New Layer
Drag under top layer - Fill selectiom with your Bright Color (FG)
Rename Bright Border
Deselect
Highlight your Sparkle Border Layer
Duplicate it twice for a total of three Layers
On each of these three Layers
DSN Flux - Bright Noise - Mix Checked - 60
Hit the mix button once for each Layer
Paste your Tube and Send to Top if it's not already there
Give it a blurry Drop Shadow
I used EC5 Impact - Perspective with the Drop Shadow preset
Crop your tag
Add your Name, CR Info and License # if Necessary
Now let's get what we need for our Avatar
Hide all layers except the Three BG Layers
Starting from the Bottom Layer
Edit - Copy
Paste as a New Image
Back to the Tag
Highlight Middle BG Layer
Edit - Copy
On the New Image
Paste as a New Layer
Back to the Tag
Highlight Top BG Layer
Edit - Copy
On the New Image
Paste as a New Layer
Get out your crop tool and crop your New Image to 150x150
So now you should have three BG Layers
Make your Borders Like you did for your Tag
Add your Name or Initial
Set aside for now
Back to our Tag
Un-hide all Layers
Merge your Tube, Name and CR Layers Together
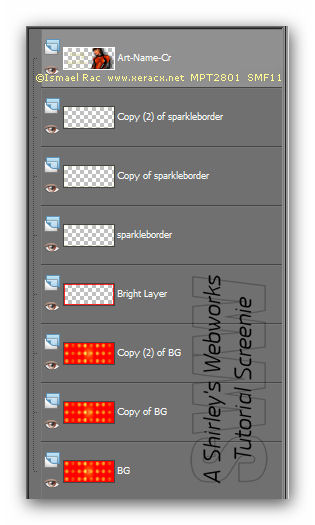
This is what you should have now
ANIMATION
Hide the Top Two BG Layers and the Top Two Sparkle Border Layers
Edit - Copy Merged
Open Animation Shop
Edit - Paste as New Animation
Back in PSP
Hide the Bottom BG Layer and Sparkle Border Layers
Unhide the Middle BG and Sparkle Border Layers
Edit - Copy Merged
In Animation Shop
Edit - Paste After Current Frame
Back in PSP
Hide the Middle BG Layer and Sparkle Border Layers
Unhide the Top BG and Sparkle Border Layers
Edit - Copy Merged
In Animation Shop
Edit - Paste After Current Frame
View - Animation to make sure it looks right
Save as a gif
Open the Avatar you made
Animate the same way you did for your Tag
Here's what it looks like when it's done

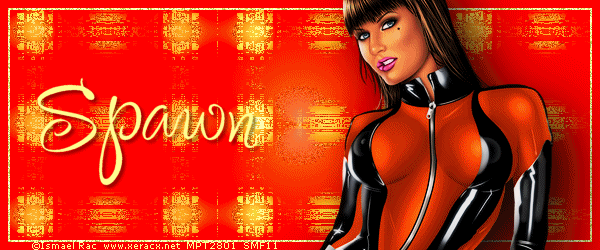
Sample Set also using art by Ismael Rac

If you try this or any of my other Tutorials,
Please leave a link in the commemnt section on my BLOG
Tutorial Ideas, Tags/Avis ©Shirley Franklin
www.shirleyswebworks.com