Hot Like Summer
This is what we will be making
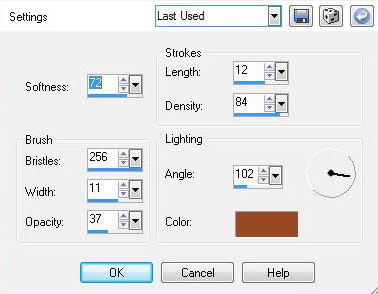
You will need: PSP - I used X3, but I'm sure any version will do the job Animation Shop I used the gorgeous art of Jessica Dougherty Do not use her art without a proper license from CILM Photo Tools-Frosted Edger-Color Xero-Porcelain (Optional) VM Toolbox-Radial Mosaic MuRa Meister-Copies Ready? New Image-600x250 Choose two contrasting colors from your tube Make a foreground-background gradient on the foreground-Angle 45, repeats 1 Fill with your gradient- Distortion Effects -Pixellate-10 symmetric checked Edge effects-Enhance Art Media Effects-Brush Strokes
The color will be the darker of your two colors Edge effects-Enhance Duplicate Layer- VM Toolbox-Radial Mosaic Adjust-Blur-Radial Blur-Default settings Blend mode to Overlay- Lower the opacity a little-Merge Visible Resize your tube to 250 px height-copy and paste in your tag MuRa Copies-Wallpaper Rotate-Default settings Adjust-Blur-Gaussian Blur- 10 Blend mode to soft light
Now is the time to grab what we need for our avatar On the bottom layer of your tag-the one with NO art Copy and paste as a new image Rectangular Selection Tool -Select the area you want for your avi and crop to selection Set this aside for later
Ok- Back to our tag - Merge Visible Photo Effex- Fiddle with the sliders til you get an edge color you like Paste your tube and move it over to the left- Xero Porcelain-Default except turn off the Blue Channel Drop Shadow
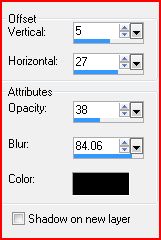
New Layer Fill with dark color matching your tube Select all-Modify-Contract 1-DELETE -Deselect Using a thick Font, type the word SUMMER- Rasterize Drop Shadow 5, 5, 38, 5 Move to the lower right side Choose a different font and type Hot Like -Rasterize Drop Shadow 5, 5, 38, 5 Move to just above SUMMER Choose another font, a scripty one and type your name-Rasterize Drop Shadow 5, 5, 38, 5 Move to right corner See the sample tag above for placement of the text layers Add your Copyright info and License #s if nececcary Hide your SUMMER and Background Layers and Merge the other layers together So now you should have 3 layers Your background layer, your SUMMER layer and your Merged layer
Now we're ready to Animate this thing! There may be other methods of creating this effect, but this is how I do it
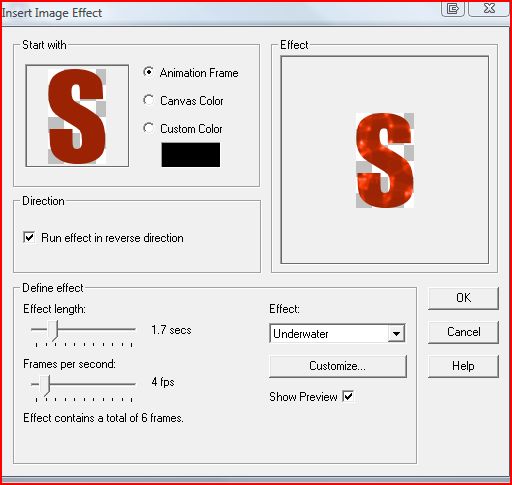
Fire up Animation Shop In PSP -Highlight your SUMMER Layer- Copy (NOT Copy Merged) Over in Ani Shop- Paste as a New Animation Effects-Insert Image Effects-Use the default Underwater settings
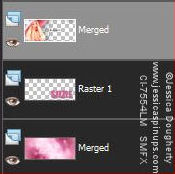
This will create 7 frames-DELETE the 7th frame Minimize this and go back to PSP Highlight the bottom layer and copy Back in Ani Shop- Paste as a New Animation This will be the base for your tag Duplicate until you have 6 frames Open your SUMMER Animation Edit-Select All-Edit-Copy Then, on your tag-Edit-Select All Edit-Paste Into selected frames and move into position and click to place Back in PSP On the Merged Layer - Edit-Copy Back in Ani Shop- Paste as a New Animation Duplicate until you have 6 frames Select all-Edit-Copy Then on your Tag with Background and SUMMER Animation Edit Paste Into Selected Frames and click to place
I used the same method to Animate the Avatar
Here's another Example
Thanks for trying my Tutorial I love seeing results, so please post links to them in the comments section on my blog Tutorial and Tags/Avis ©Shirley Franklin / www.shirleyswebworks.com

|