Fade to Grey
This is what we will be making
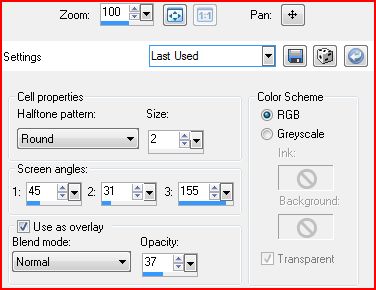
For this example , I used the art of Keith Garvey Do not use his work without a license from MPT MuRa Meister-Copies Xero-Porcelain PSP-I used X3, but any version should work Animation Shop This is a fairly long one, so grab a cup of coffee and settle in Ready? Lets Begin! New image, 600x250 Select all-Paste your tube into the selection Deselect- MuRa-Copies-Wallpaper Rotate-Default Settings Adjust-Blur, Motion Blur-96, 100% Edge Effects-Enhance-Duplicate Layer On the new Layer, Artistic Effects-Halftone
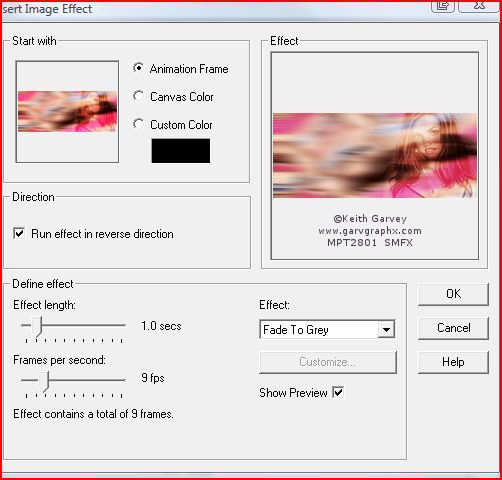
Change the blend mode to Overlay and merge visible Choose a color from your tube for the foreground-background null Get out your Rectangle tool- Create on Vector Checked, width 15 Draw out a rectangle just a little bigger than your canvas-convert to Raster Free Rotate-24, left-move to the left side Magic wand-click inside your rectangle-Modify expand by 5 Highlight your background layer and promote selection to layer Highlight your background layer again Distortion effects-wind- Left, 100 Back to your Rectangle Layer Magic wand-select inside your rectangle-Modify-expand by 2 Copy and paste your tube -move inside the rectangle Selection-invert- DELETE-Deselect Xero-Porcelain-move the blue channel slider to 0 Give your tube a drop shadow-I used 5, 5, 50, 5 On the rectangle layer Xero-Porcelain-move the blue channel slider to 0 Hide the background layer and merge visible-Unhide the BG Give your framed layer a blurry drop shadow I used 5, 27, 41 and 84 New Layer-fill with dark color from your tube Select all-Modify-Contract 2-Delete-Deselect Highlight your Background-Paste your close-up and move to the right Change the blend mode to Luminance and lower opacity to around 30 Merge down into the background Crop your tag to size Now is the time to add your CR info and Name Hide your Background Layer and Merge visible Now you should have two layers Let's animate this thing! Highlight your background Layer and edit-copy Open up Animation shop and paste as a new animation Insert Image Effects-choose the Fade to Grey Effect
Delete the 10th Frame Edit -Select all-Edit copy-Select none, then click on the 9th frame to select it Paste After current frame-Now you should have 18 frames Hold down your ctrl key and click to select the last 9 frames Animation-Reverse Frames-edit-select all Animation-frame properties-change the frame rate to 50 Still with me? We're almost done, lol Back in PSP - Copy your top layer and in Ani shop Paste as a new animation duplicate frames until you have 18 frames Edit - Select all-edit copy Go to the animated background you made before Edit-select all -edit-paste into selected frame Make sure it's placed where you want it and click to place View animation to make sure it looks good and save as a gif And that's it-you're done!
I have done this one a few times using different shapes This example, using a Star shape Art by Katherine Barber You can get a license to use her art at Up Your Art
Another example using a circle shape Art by Steve Baier - You can get a license to use his art at Up Your Art
Thank you for trying my tutorial! I love seeing results, so if you try it please leave a link in the comments section at my blog
Tutorial and Tags ©Shirley Franklin www.shirleyswebworks.com

|