Circular StreakerThis is what we'll be making:
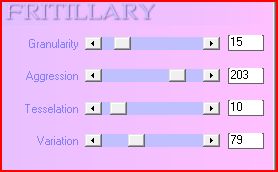
You will need: A tube and a close-up I used the art of Keith Garvey Do not use his art without a license from MPT Xero - Fritillary and Porcelain MuRa Meister-Copies Psychosis - Circular Streaker DSB Flux-Bright Noise (to animate) Greg's - Pool Shadow Ready? Lets Begin! New image 600x250 Paste your tube as a new layer-Mura Copies Wallpaper rotate-default settings Adjust blur -Motion Blur-257, 100% 2-3 times Crop your tag Duplicate-On the dupliacte-Xero-Fritillary
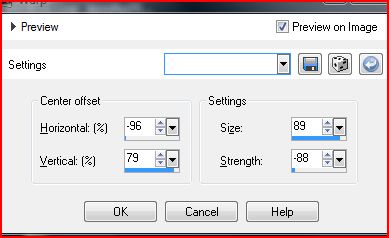
Psychosis-Circular Streaker-Streaks 48 - Send to bottom So now your Blur layer should be the top layer Edge effects-Enhance-Blend mode to Overlay Duplicate-Mirror and set the blend mode to Screen Merge Visible-Now you have made your Background. Choose a color from your tube for Foreground, Background Null Rectangle tool- Draw out a rectangle taller than your tag- You should be able to see only the two vertical lines Objects-align-center in canvas-Rasterize CROP YOUR TAG Effects-Distortion effects-Warp
Duplicate-Mirror and flip it-Hide your BG and merge visible Unhide your BG layer and Highlight your Warp layer Xero-Porcelain-Blue Channel to 0 Greg's Pool Shadow-Change Intensity to 50 Drop Shadow-2, 2, 51 and 15.94 Highlight BG and paste your Close-Up and move to the right Change the blend mode th Multiply and lower the opacity to 50 Highlight top layer-Paste your Tube-Move to the left side Xero - Porcelain -Same settings as before Drop Shadow - 2, 2, 51 and 36.23 New layer-Fill with a dark color from your Tube Select all- Contract by 1-Delete-Deselect Hide warp and BG Layers and Merge Visible Tine to add your Name, CR Info and License Number if necessary Merge down Now you should have 3 layers The top Layer with Tube, Border, Name and CR The Warp Layer The Background Layer If you choose not to animate, you can merge visible annd save as a jpg
ANIMATION Duplicate your Warp layer twice for a total of 3 On the top one-dsb flux-bright noise-31, mix Do the same on the other two bright noise layers, hitting the mix button each time Open Animation Shop In PSP, hide the top two warp layers-all other layers showing Copy Merged-in Ani Shop Paste as New Animation Back in PSP-Un-hide the middle warp layer-Copy Merged In Ani Shop Paste After current frame Back in PSP Hide the middle warp layer-Unhide the top one-Copy Merged In Ani Shop Paste After current frame Edit-Select all-Animation-Frame Properties Change the Frame rate to 35 View Animation-If you like it, save as a gif
Thank you for trying my Tutorial. I love to see results, so please post them in the comments section of my BLOG
Tags and Tutorial by Shirley Franklin www.shirleyswebworks.com ` 
|